
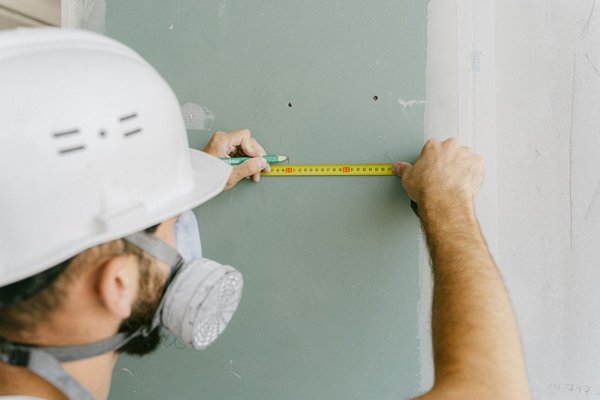
A small hole in drywall can look worse than it is. Nail holes, screw holes, anchor holes, and minor dents usually do not require replacing a section of wall or calling a contractor. With a putty knife, patching compound, sanding material, and matching paint, most homeowners can handle it.
The trick is not simply filling the opening. A clean drywall hole repair removes loose material, keeps the patch flat, and blends the repaired spot into the surrounding wall. Using too much filler is one of the main reasons a small patch stays visible after painting.
Make Sure the Hole Is Small Enough to Fill
A nail hole, screw hole, small anchor hole, shallow gouge, or narrow puncture can usually be filled directly with spackle or another drywall filler made for minor repairs. If the opening is wide enough that filler falls into the wall cavity, the gypsum is badly crushed, or the drywall feels soft from moisture, use a mesh patch or a small drywall insert instead.
Check the cause before covering the damage. A picture-hook hole is straightforward. A hole beside a leaking pipe, under a window with water staining, or in damp drywall should not be patched until the moisture problem has been fixed.
Gather the Basic Tools
For most small repairs, you need a putty knife, suitable spackling compound or drywall filler, fine-grit sanding material, a clean cloth, primer when needed, and matching wall paint. A wider putty knife can help create a smoother transition.
Drying and painting times vary by product, temperature, humidity, and depth of fill. Follow the manufacturer’s directions rather than assuming every filler dries at the same speed.
Prepare the Damaged Area
Inspect the edge of the hole for lifted drywall paper, loose paint, or crumbly gypsum. Remove only material that is no longer firmly attached. Avoid turning a sound small hole into a larger repair.
Wipe away dust so the compound can bond properly. If the wall is greasy or dirty, clean the area with an appropriate mild cleaner and allow it to dry before patching drywall.
If you are working in a U.S. home built before 1978, remember that sanding or scraping old painted surfaces can create hazardous lead dust. Check current EPA lead-safe guidance before disturbing paint that may contain lead.
Apply the Drywall Filler
Press the Compound Into the Hole
Pick up a small amount of filler with the putty knife and press it into the opening. Then draw the knife across the wall to remove excess material. The hole should be filled, but the surrounding surface should remain as flat as possible.
For a deeper screw-anchor hole, avoid packing in one oversized mound. A thick application can shrink, crack, or stay soft underneath. Apply a modest first layer, let it dry as directed, and add a second thin layer if the spot still has a depression.
Feather the Edges
On the final pass, hold the knife at a shallow angle and spread a very thin film just beyond the hole. Feathered edges are easier to hide than a raised ring of compound.
For example, suppose a plastic wall anchor leaves a rough opening about the size of a pencil eraser. Trim any raised paper, press filler into the cavity, and scrape it almost flush. After it dries, add a second skim coat only if you can still feel a dip. This usually gives a cleaner result than overfilling the hole on the first pass.
Let the Patch Dry Fully
Do not sand simply because the surface looks dry. Deeper filler can remain softer underneath. Waiting for the full drying time specified on the product helps prevent the patch from tearing out when you sand it.
Fast-drying fillers can make timing easier, but the product label should guide you. Warm, dry rooms may speed drying, while thicker fills and humid conditions can slow it down.
Sand the Repair Smooth
Once the filler is fully dry, sand lightly until the patch feels flush with the wall. Use gentle pressure and check the surface frequently with your fingertips. The goal is to remove knife marks and high edges without creating a hollow spot.
Shine a lamp across the wall from the side if you want to catch small ridges. Low-angle light reveals uneven areas that normal room lighting can hide. Wipe away the sanding dust before priming or painting.
If the wall has texture, keep sanding tightly controlled so you do not flatten the surrounding finish. Related projects that fit naturally with this repair include repairing drywall cracks, fixing small wall texture damage, and preparing walls before painting.
Prime and Paint the Patch
Fresh patching compound can absorb paint differently from the existing wall, sometimes leaving a dull or shiny spot. Standard filler often benefits from primer before the finish coat, although some newer repair compounds are designed with primer-enhanced formulas. Follow the product directions.
Use the same paint color and sheen already on the wall. A small touch-up may blend well if the existing paint is fairly fresh. On an older wall, fading and sheen changes can make a tiny painted spot obvious, so repainting a larger section may create a more even finish.
Avoid These Common Drywall Repair Mistakes
The biggest mistake is applying too much filler. A thick mound requires extra sanding and can leave a smooth halo around the repair. Other common problems include filling over loose paper, painting before the compound is dry, leaving sanding dust behind, or using paint with the wrong sheen.
Do not keep adding compound to a hole that lacks support. If filler sags into the wall cavity or the edges keep breaking away, switch to a suitable mesh patch or drywall insert.
Frequently Asked Questions
Can you patch a small drywall hole with spackle?
Yes. Spackling compound is commonly used for nail holes, screw holes, anchor holes, and similar minor interior drywall damage. Choose a product rated for the size and depth of your repair.
How many coats of filler are needed?
A shallow hole may need only one coat. A deeper hole often looks better with two thin applications because the first fills the cavity and the second corrects any slight shrinkage or depression.
Do you need to prime a drywall patch before painting?
Primer is often useful because patching compound may absorb paint differently from the surrounding wall. If you are using a primer-enhanced repair product, check its instructions to see whether a separate primer is recommended.
When should you use a patch instead of filler?
Use reinforcement when the opening is too large or damaged for compound to stay supported by itself. A mesh patch or small drywall insert is a better choice when filler would sag into the cavity or the surrounding board is broken.
Finish With a Flat, Clean Surface
A successful small drywall repair comes down to restraint: remove loose material, use only enough filler to close the damage, feather the edges, let everything dry fully, and sand lightly. Once the patch feels flat and the dust is gone, careful priming and matching paint can make the repair blend into the wall instead of drawing attention to it.